Golf installations
A way to improve your skills, as well as a great opportunity,
to increase the value of your property.
A way to improve your skills, as well as a great opportunity,
to increase the value of your property.
A way to improve your skills, as well as a great opportunity, to increase the value of your property.
A way to improve your skills, as well as a great opportunity, to increase the value of your property.
Perfect harmony of nature and innovation
Golf is not just a sport – it's a passion, a lifestyle, and a unique experience. At Golfmasters, we fully understand the needs of enthusiasts of this discipline and provide the highest quality golf installations that combine modern technology with unparalleled aesthetics. Our solutions are effective in both professional golf clubs and private residences.


How is a private golf installation created?
The construction of a golf installation is a process that requires many actions and decisions. In the era of modern technologies and design tools, we can much more easily and efficiently conduct an analysis of all key factors so that the final effect meets the expectations of players and aesthetic standards.

STEP I
Contact and initial estimate
The first step to collaborating with us is not only getting to know the team but also our products. To this end, we have prepared a contact form. By leaving your email address, you will receive our catalog, in which you can find many useful pieces of information, including price ranges per square meter for various solutions as well as insights into our portfolio. The next step is to define the parameters of the project. Helpful for this will be: photos from the location where the investment is planned, a hand-drawn map or geodetic plans, information about the estimated area, etc. If you are interested in furthering the process, we schedule a meeting at the investment site to conduct a site visit. It is worth noting that the site visit does not require a decision on the final implementation of the project; however, it is associated with a project fee.
STAGE II
Site inspection
After the preliminary acceptance of the conditions for the site visit, at a convenient time for you, the Golf Masters team will arrive and perform aerial documentation using a drone. This will be used for the simulation/visualization of the green at a 1:1 scale. Thanks to the high-quality 4K photos, you will be able to see the anticipated effect of the entire planned golf infrastructure. The site visit is also an opportunity to see samples of grasses and how they connect with each other. It is also a good time to discuss details regarding expectations and agree on the necessary details to initiate the final design process (green mapping).
STAGE III
Design (green-mapping)
Site analysis and installation possibilities: a detailed assessment of the space regarding weather conditions, loads related to the materials necessary for the installation, and the ability to access the construction site with heavy equipment (or the development of hybrid concepts), etc. Installation properties: development of a concept (one or several) for the green contours and additional elements. Selecting the appropriate types of golf grasses, determining slopes, breaks in a percentage system (slope inclination), and proposing a drainage plan for the training area. Functional properties: determining the number of flags on the green (the possibility of hiding additional holes through a cap system). Verification of the correlation between the green and tee boxes to maximize playability and create the best possible training conditions.
STAGE IV
Installation work
Estimating the installation time, the availability of various materials, and coordinating the installation date is the next stage of the project. The installation is carried out based on the previously created design (green mapping), which outlines the specification of: size, contour of the green, and additional elements such as fringe/fairway/tee boxes/bunkers; slopes and breaks; positioning of flags and tee boxes. In the first stage, earthworks related to the shape of the installation are conducted. Estimating the installation time, the availability of various materials, and coordinating the installation date is the next stage of the project. The installation is carried out based on the previously created Green Mapping, which outlines the specification of: size, contour of the green, and additional elements such as fringe/fairway/tee boxes/bunkers; slopes and breaks; positioning of flags and tee boxes.
STAGE V
Sandblasting and project acceptance
This is the most important stage of constructing the green and golf infrastructure. The sanding process determines the quality and playability of the entire installation. It is carried out using different grades of specialized sand. The project price includes tools for basic maintenance and training (a digital version of the instructions is also available). The sanding stage requires good weather conditions. The area should be dried by the sun so that the sand can freely penetrate and compact into the grass turf. Only well-compacted grass will replicate the proper cushioning conditions for the different grasses.
STAGE VI
Nursing visit
All golf installations require time to mature. Based on the guidelines received from our specialists (basic accessories such as a roller and brush are provided to each client during the project implementation), it is possible to significantly accelerate this process at the end of the installation. However, if you would like to take advantage of our assistance – we are available. Maintenance visits should be scheduled well in advance and it's advisable to plan them at the start and/or end of the golf season.
Why should you choose Golfmasters for golf installations?
Designing golf installations is a complex process of planning and building the infrastructure needed for playing the game of golf. The facilities must be thoughtfully considered in terms of functionality as well as user safety. The end result is a comprehensive space that provides players with exceptional experiences and encourages them to engage in this beautiful sport.
Precision engineering and innovative materials
Our installations are designed with attention to every detail, just like on a real golf course. Our offer includes a variety of materials for surface finishing, from green grasses to fairway or rough grasses, as well as tee boxes and underlayment that improve cushioning or increase golf ball roll. We use the latest technologies that guarantee durability and perfect playing conditions all year round.
Individual approach to each project
The highest quality and aesthetics
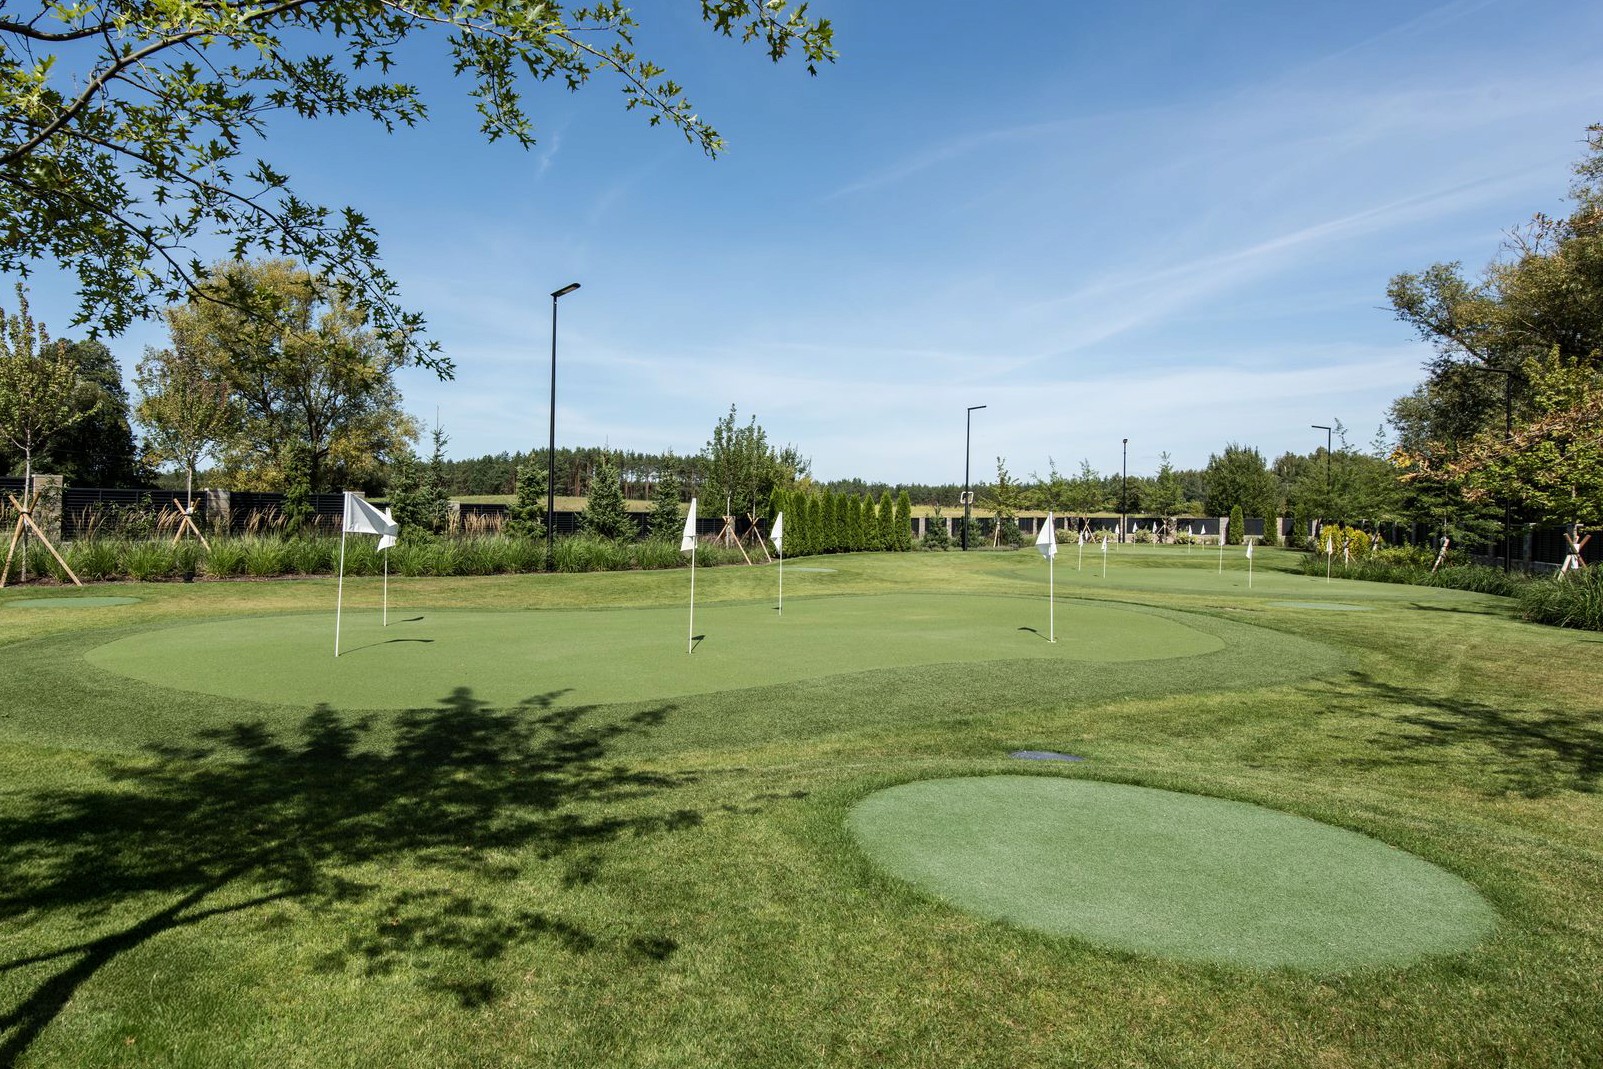
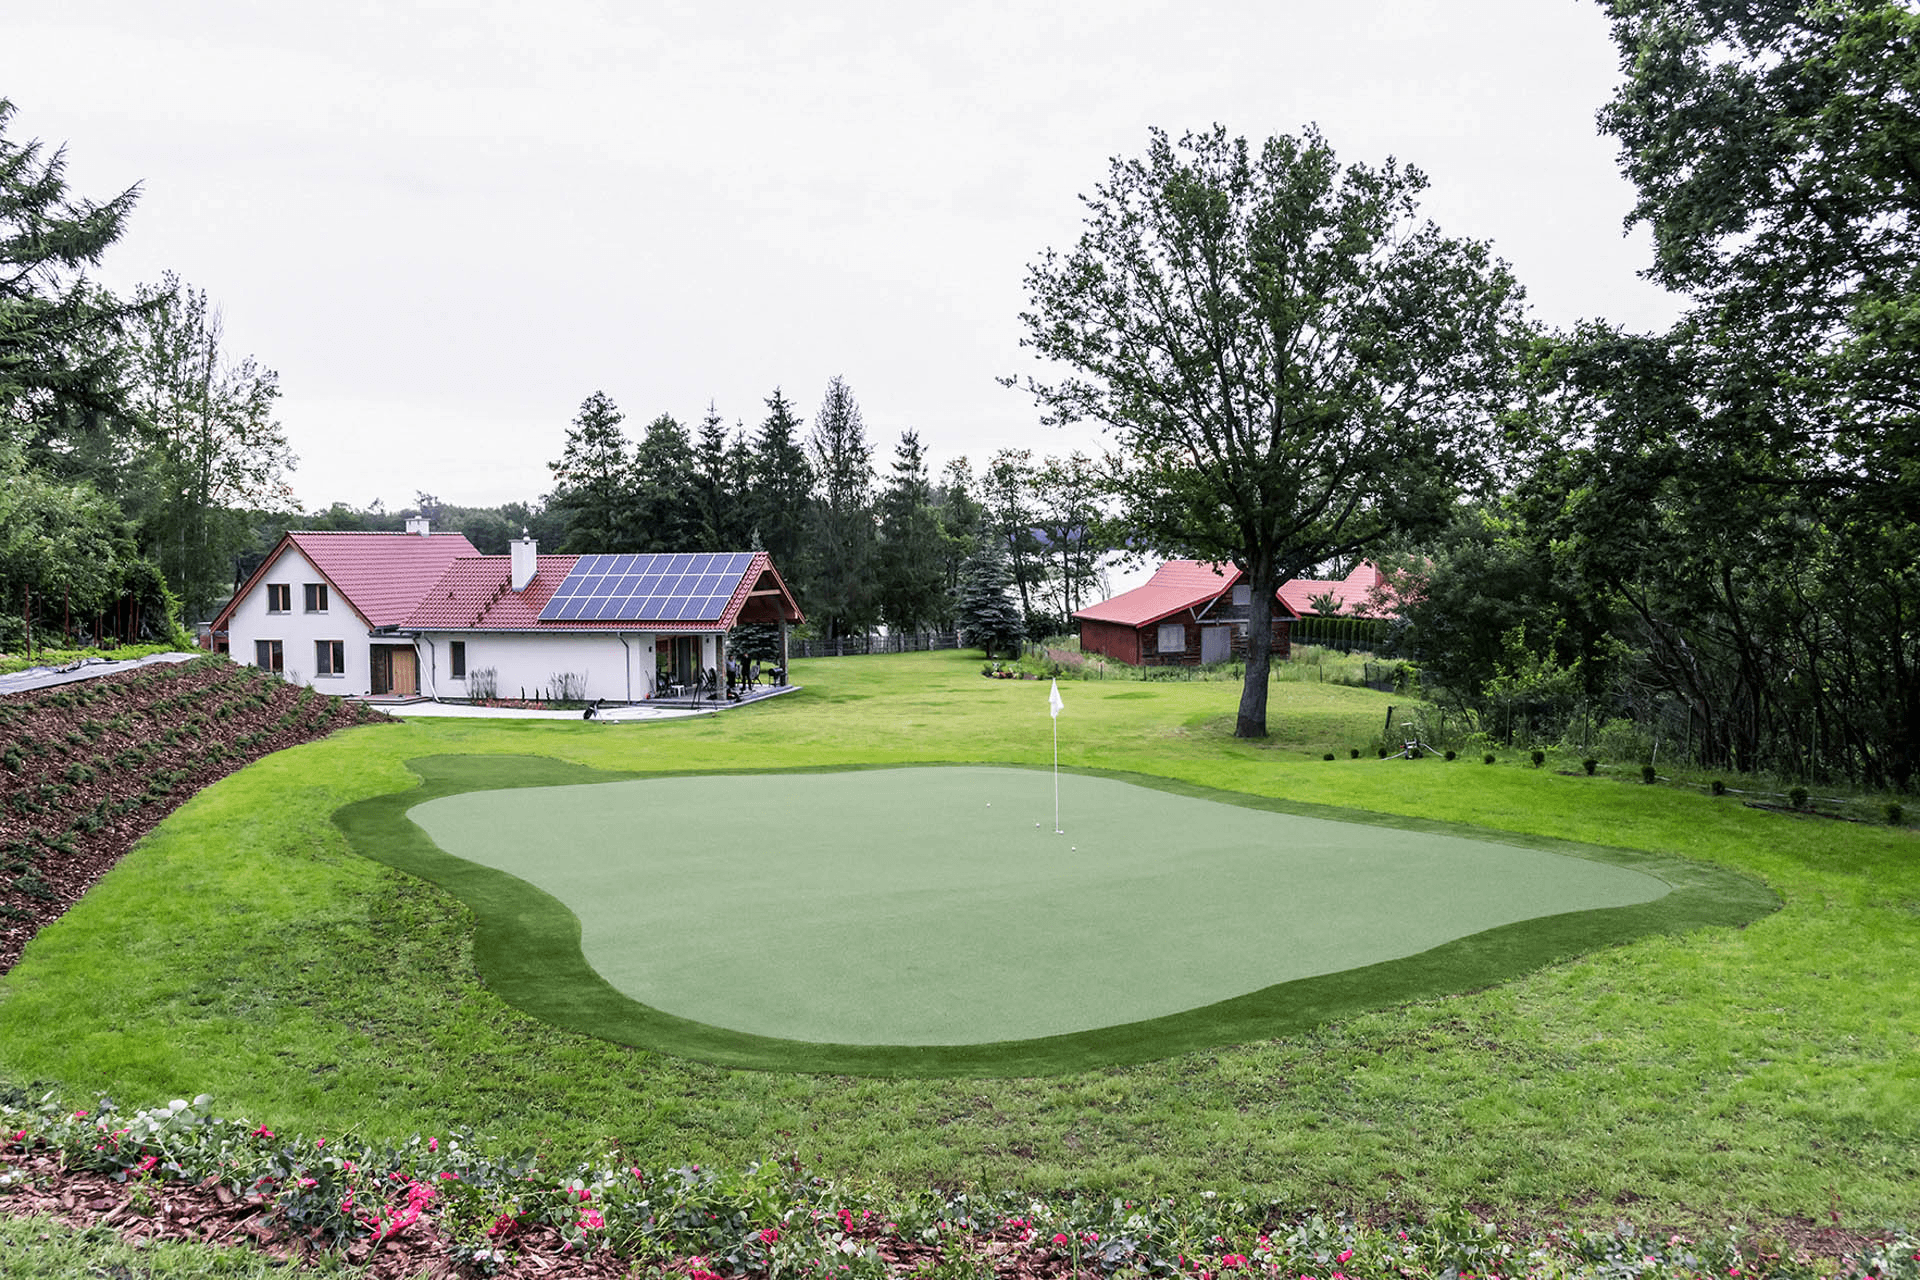
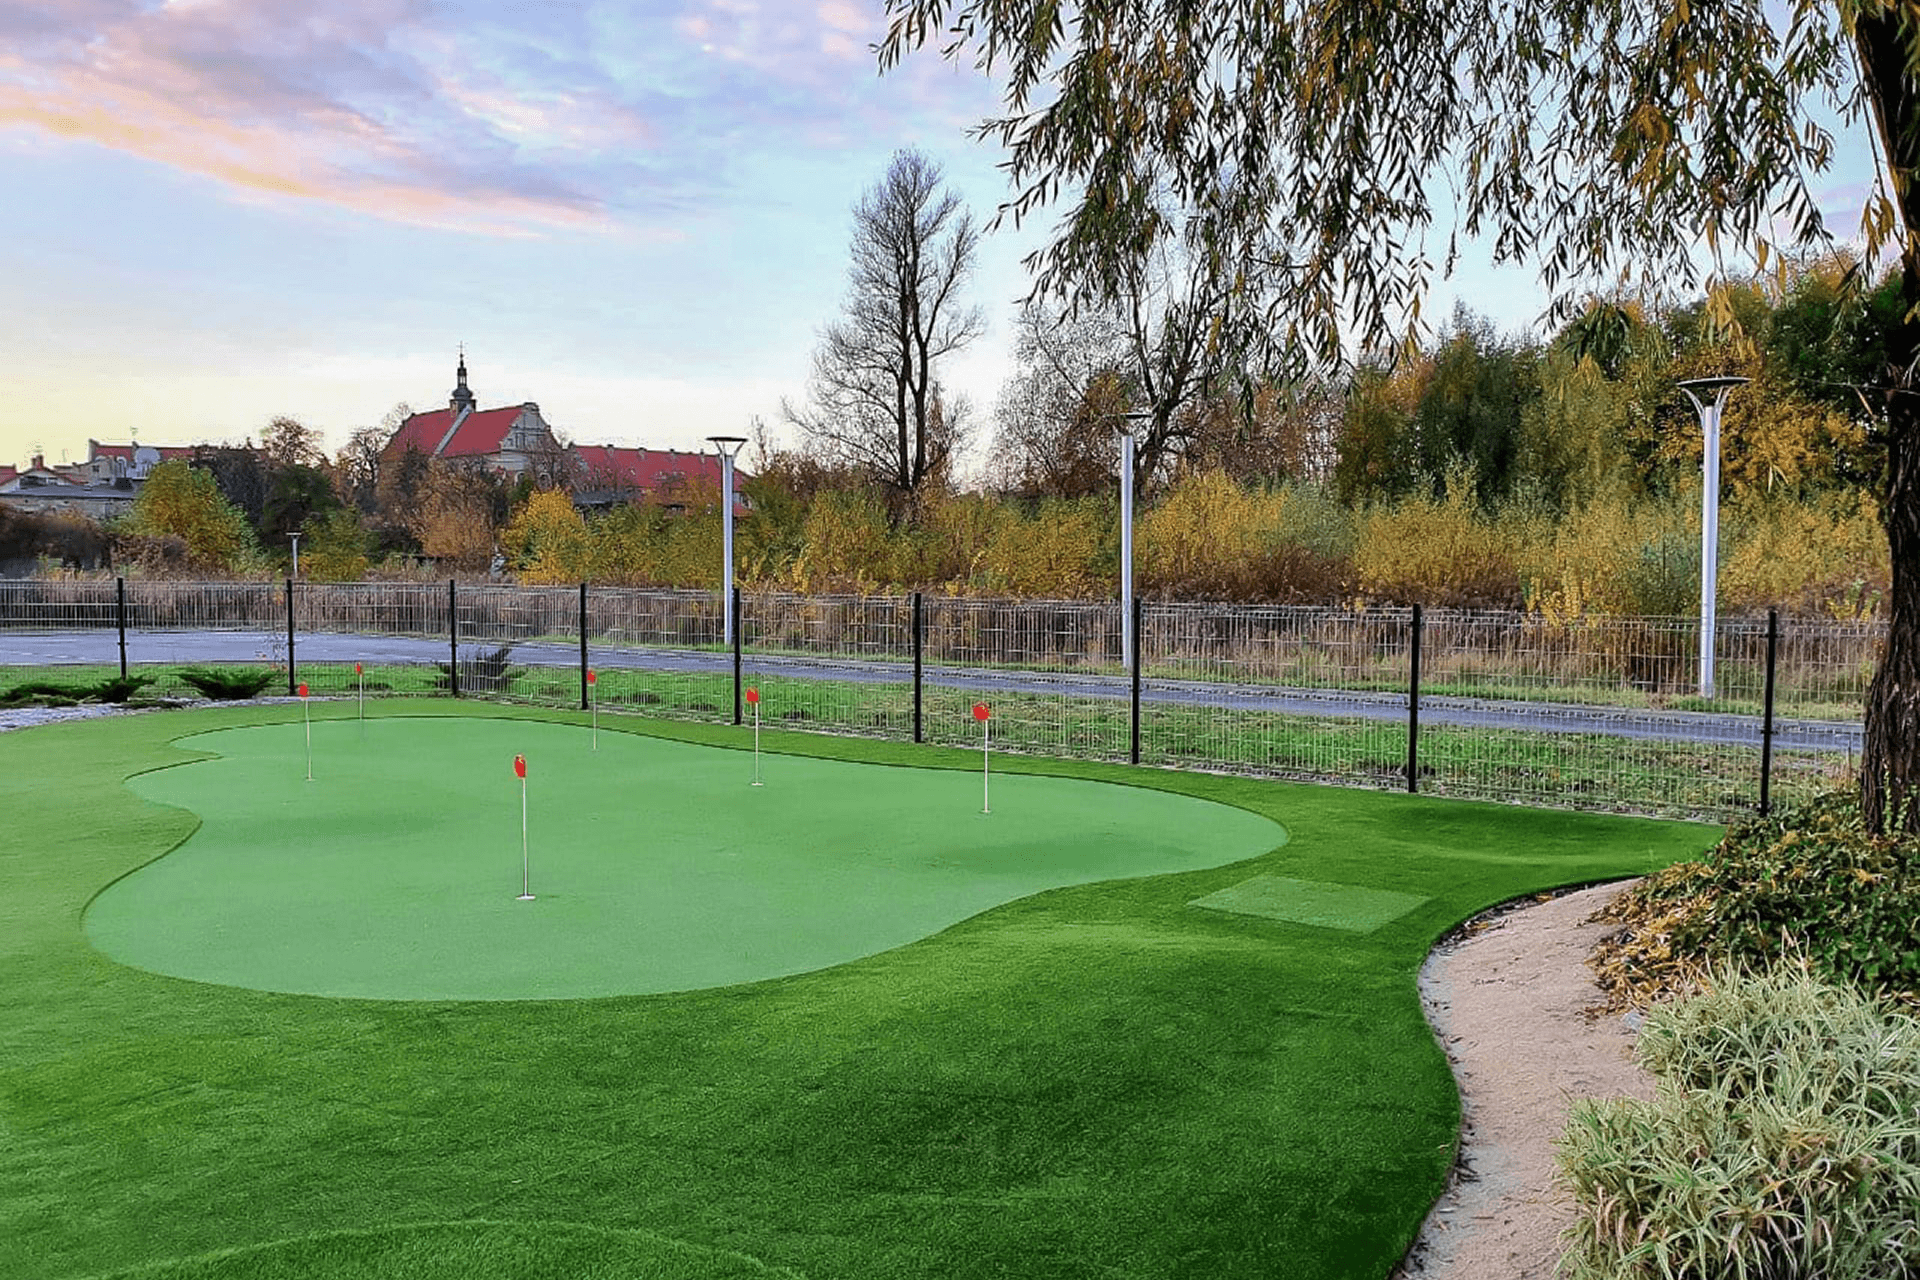
Sample implementation before and after
Designing golf facilities is a complex process of planning and building the infrastructure needed for playing the game of golf. The facilities must be thoughtfully designed both for functionality and the safety of users. The end result is a comprehensive space that provides players with unique experiences and encourages them to engage in this beautiful sport.
Types of golf grasses
All types of grass that we use in our projects are carefully selected to ensure that the golf course looks perfect all year round. Our strength lies in the quality and attention to detail of our grass - it is important to remember that golf grasses are primarily sports grasses, not just decorative ones, which is why they are characterized by greater durability under intensive use.

Tee Box Pro
The grass is best suited for constructing tee boxes. Thanks to its high density and appropriate stiffness, it allows tee pegs to be inserted anywhere. Durability is guaranteed by polyamide (PA) fibers. The product is cut to the project from a roll that is 2m wide.

Fringe
Grass used for creating a collar around the green. Thanks to the longer fibers, it promotes a good positioning of the golf ball, which in turn leads to effective chipping training around the green. The fibers are made of polyethylene (PE). The product is cut from a roll that is 4m wide.

Fairway
Grass used mainly for practicing pitches and long shots, as well as being a graded element around the green, which makes it easy to see the clear division into different playing zones. Cut from a roll of 4m width.

Rough
The grass is mainly used for practicing shots from very deep grass placed on the field as a deliberate difficulty. The grass can also have a decorative character due to its very realistic appearance. Cut from a roll with a width of 4m.

Green
In our offer, we have various types of green grasses – specifically dedicated to putting and very short chips around the green (Precision putt) as well as semi-approach and approach grasses. The green, as the heart of the installation, is selected at the beginning of the project based on your preferences. Grasses are cut from rolls 4m wide.
Tee Box Pro
The grass is best suited for constructing tee boxes. Thanks to its high density and appropriate stiffness, it allows tee pegs to be inserted anywhere. Durability is guaranteed by polyamide (PA) fibers. The product is cut to the project from a roll that is 2m wide.
Fringe
Grass used for creating a collar around the green. Thanks to the longer fibers, it promotes a good positioning of the golf ball, which in turn leads to effective chipping training around the green. The fibers are made of polyethylene (PE). The product is cut from a roll that is 4m wide.
Fairway
Grass used mainly for practicing pitches and long shots, as well as being a graded element around the green, which makes it easy to see the clear division into different playing zones. Cut from a roll of 4m width.
Rough
The grass is mainly used for practicing shots from very deep grass placed on the field as a deliberate difficulty. The grass can also have a decorative character due to its very realistic appearance. Cut from a roll with a width of 4m.
Green
In our offer, we have various types of green grasses – specifically dedicated to putting and very short chips around the green (Precision putt) as well as semi-approach and approach grasses. The green, as the heart of the installation, is selected at the beginning of the project based on your preferences. Grasses are cut from rolls 4m wide.
The highest quality and aesthetics
Elegance and naturalness are our priorities. Our installations blend seamlessly into the surroundings, highlighting their landscape features and creating a space for relaxation at the highest level.
Elegance and naturalness are our priorities. Our installations blend seamlessly into the surroundings, highlighting their landscape features and creating a space for relaxation at the highest level.
Elegance and naturalness are our priorities. Our installations blend seamlessly into the surroundings, highlighting their landscape features and creating a space for relaxation at the highest level.
Greenkeeping
One of the key advantages of artificial grass is its low maintenance requirements compared to natural grass. However, this is not a situation where the grass requires absolutely no care. The set of specialized activities that should be carried out periodically on the artificial green is not complicated but is essential for the area to remain in good condition for many years.

Cleaning
The surfaces of the green should be regularly cleaned of needles, leaves, animal feces, moss, weeds, etc., using a brush, blower, vacuum cleaner, or through specialized chemicals.

Sandblasting
Carried out depending on the loss of sand on the green. This happens over time, as sand from the green can escape with water or on our shoes. Once a year, and sometimes less frequently, is probably enough.

Watering
It should be done regularly, especially on days with large temperature differences. This can be automated watering that is turned on along with watering the rest of the lawn or manual watering.

Rolling
The execution of this procedure depends entirely on what roll our ball has on the green. In principle, rolling should nicely level the grass surface and speed up the green - it is important to perform it in both directions and after previously moistening the grass with water. This is a procedure that should be done each time after sanding.

Brushing
A procedure opposite to rolling. It involves the releasing of the green or redistributing sand on the green where it has accumulated in excess.
FAQ - Frequently Asked Questions
Every project we have completed is a testament to our attention to detail and individual approach to the client. We proudly present the results of our work, which meet the expectations of even the most demanding golfers.
Are there guidelines regarding the size of the land for golf installations?
There are no limitations on the size of the area subject to installation. It all depends on the Client's needs. The most important thing is to optimize the installation parts and materials used in the project – because while the installation can be of any size, its cost-effectiveness may vary (for example: the logistics of heavy equipment to a 30m2 green may cost the same as to a 100m2 green – in terms of cost per m2, the smaller solution will be more expensive).
Are there guidelines regarding the type of terrain for golf installations being implemented?
The area where the work will be carried out should be biologically active in some way. It is not recommended to build this type of installation on concrete slabs, etc. The temperature variation throughout the entire calendar year in our climate is so diverse that we cannot ensure the durability of the substructure on concrete ground.
In which months do I implement outdoor golf projects?
The season for this type of installation lasts from late April to September, depending on weather conditions. To carry out these types of projects, we need high temperatures and low humidity.
In which months do I implement outdoor golf projects?
The season for this type of installation lasts from late April to September, depending on weather conditions. To carry out these types of projects, we need high temperatures and low humidity.
In which months do I implement outdoor golf projects?
The season for this type of installation lasts from late April to September, depending on weather conditions. To carry out these types of projects, we need high temperatures and low humidity.
In which months do I implement outdoor golf projects?
The season for this type of installation lasts from late April to September, depending on weather conditions. To carry out these types of projects, we need high temperatures and low humidity.
Are artificial grass installations durable?
Yes, the installations are durable and last for years. Our products are resistant to UV light, which means they do not lose their colors, and the foundation we implement is selected appropriately for the given ground under the installations. With minimal engagement, the installations can look fresh for many years.
Are golf installations maintenance-free?
Of course not. Let’s remember that although the surface finish is made of artificial grass, the green itself should be treated just like real grass, except for mowing and chemicals. Installations should primarily be used regularly - otherwise, like anything exposed to weather conditions, they can become neglected. Installations with artificial grass should be regularly cleaned and sanded (serviced), as well as watered during the summer season (appropriate moisture of the sand embedded in the fibers allows for less strain on materials during drastic temperature changes).
When is the best time to report for installation service?
For the best effect, it is recommended to have 2 visits per year – early spring and autumn. Visits are priced individually based on the scope of work to be done and the logistics of the crew. It is best to inquire about dates well in advance – for early spring services as early as winter, and for autumn services during the summer.
Can I perform the installation service myself?
Of course. We will gladly provide guidelines for you to independently maintain the installations, so that you can respond to your own needs in the most effective way. If during the project implementation and user training you are able to arrange for someone to take care of your garden, we will be happy to teach them how to carry out such treatments in the future.
What should be avoided in this type of installation?
In practice, we should behave as if the installation was made of real grass, meaning that you should not walk on the green after heavy rain (to avoid damaging the base) or in freezing temperatures (to prevent breaking the grass fibers). Snow removal or having barbecues/campfires near the installation is not allowed. One should enter the installation area with appropriate footwear – shoes that apply point pressure on the base, like women's stilettos or shoes with metal spikes, are prohibited. We should also not test any chemical substances on the installation that may cause discoloration of the grass (in this case, it is best to test various products on samples/cuts left after installation). In a nutshell – use common sense😊
How to effectively deal with moss on the green?
The best method for fighting moss is its mechanical removal. In this case, we recommend pressure washers (the pressure should be carefully adjusted to avoid damaging the surface) or rotating brushes with relatively soft bristles. It is important to remember that such treatments will likely lead to a loss of quartz sand (of the appropriate fraction), which needs to be replenished.
How much grass is required for the implementation of this type of project?
Most often it is between 5 and 10 working days for greens up to 200m2.
How much grass is required for the implementation of this type of project?
Most often it is between 5 and 10 working days for greens up to 200m2.
How much grass is required for the implementation of this type of project?
Most often it is between 5 and 10 working days for greens up to 200m2.
How much grass is required for the implementation of this type of project?
Most often it is between 5 and 10 working days for greens up to 200m2.


